Install Desktop Programs from Ninite
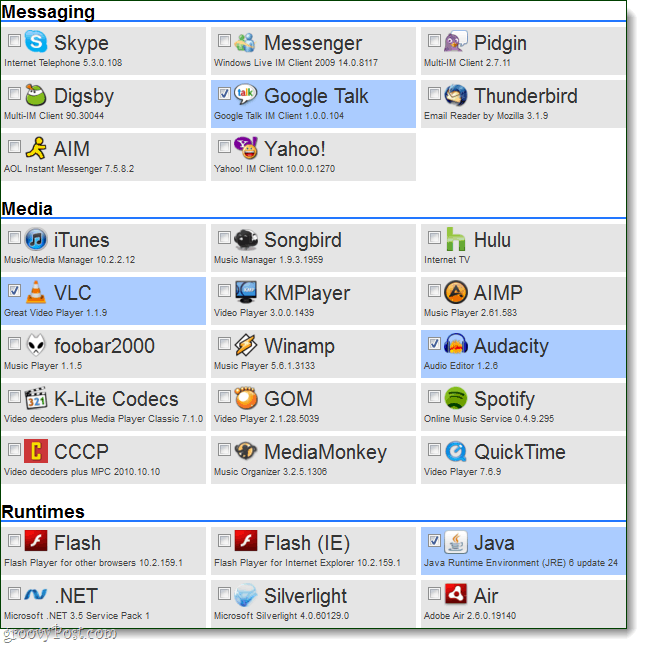
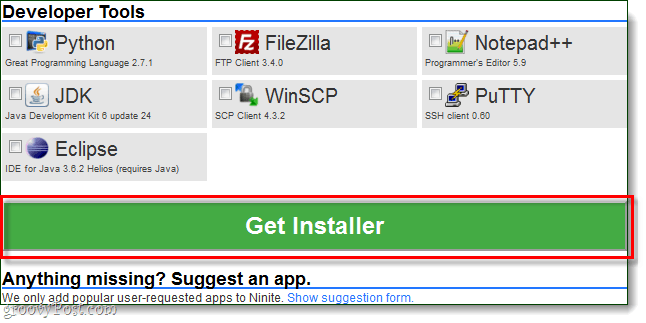
Start by heading over to ninite.com using your preferred browser. On the Ninite.com website, you’ll find a huge list of apps, and all of them (except for the MS Office trial) are free to use. Typically, you’ll only need 1-2 programs per category, but don’t let me stop you from grabbing as many as you want.
Once you have the programs you want to be checked, Scroll down to the bottom and Select Get Installer. The Ninite installer should start downloading, once it finishes –Run it.
The installer will automatically go through and install each program one at a time, but you won’t have to do anything! You can let it run in the background or just sit there and watch it. Once the installation is finished, click Close.
That’s all there is to it, all of your programs should be installed and ready to use.
Done with Installation!
Now let’s set up Ninite to automatically update the programs we just installed on a regular basis. Using Ninite to update is a lot easier than individually updating each program, and we can set it so that we won’t even notice when the updates are going through.
Step 1
Click the Start Menu Orb and Type task scheduler in the search box, then press Enter.
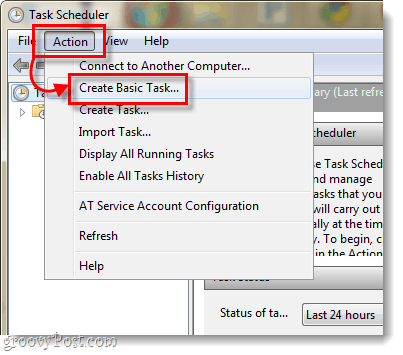
Step 2
In the Task Scheduler window, click the Action menu and then select Create Basic Task…
Step 3
Now we’re in the task creation wizard. On the first page just enter a name for the task, such as “Ninite Updater,” and then Click Next.
Step 4
On the Trigger page, Select Weekly then Click Next. Since most programs don’t update on a daily basis, checking for updates daily is a bit overkill.
Step 5
Set a Time of day that you would like the update to occur, and then Set what day of the week you would like the update check to go through on.
Step 6
On the Action page, select Start a program.
Step 7
Now you’ll need to click Browse and navigate to the Ninite installer that you downloaded from ninite.com. It is likely in your Downloads folder, but you can move it anywhere you like. Once you’re done selecting it, Type /silent into the “Add arguments” box. Then Click Next.
Step 8
On the final summary page, make sure everything looks good and then click Finish.
You’re Done
Now Ninite will automatically check for updates on a weekly basis for all of the programs that you selected the Installer to include. Even if you already have programs installed, you can select them on ninite.com and add them to the installer if you would like to use Ninite to keep them updated. This is the grooviest way I’ve found of keeping the majority of the software on my PC up to date automatically. Very simple yet effective! Comment Name * Email *
Δ Save my name and email and send me emails as new comments are made to this post.


![]()
