Open Windows Live Writer and add the image you want to watermark. Click on Insert and browse the image you want to add.
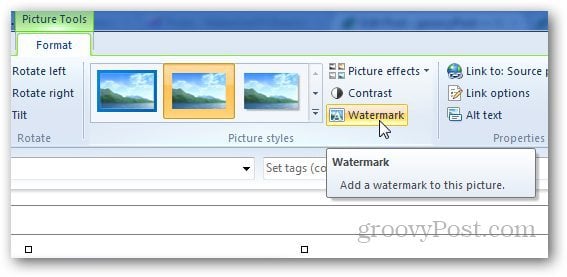
After adding the image, click on the watermark button.
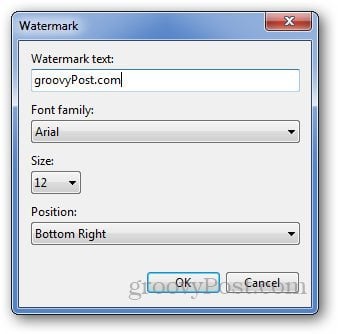
Add the watermark text you want to use on the image, select font and position then click OK.
Now, in the same Insert tab, you’ll see Set to Default button under Settings box. Click on it to set the used watermark as default.
Next time you upload any image for that blog, it will automatically add the default watermark. Similarly, if you working with different blogs, you can set up watermarks for each one. You don’t have to add the watermark every time you are adding any images.
Comment Name * Email *
Δ Save my name and email and send me emails as new comments are made to this post.


![]()
