Update Kindle Reader Firmware
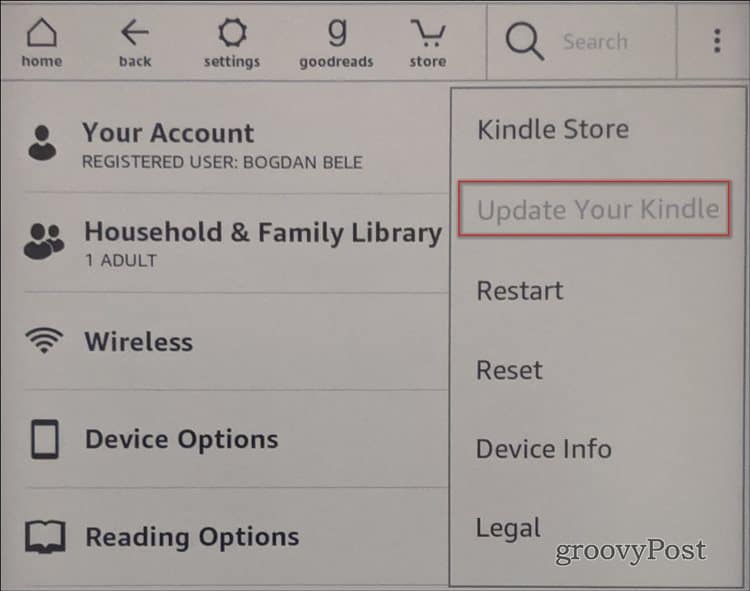
To check your Kindle’s firmware, tap the Menu button (“the three dots”) and choose Settings. Then, tap the Menu button again. If the option to Update your Kindle is not grayed out tap it. Your Kindle will update, restart, and then have the latest firmware version.
Install Custom Fonts on Kindle Reader
After you’ve made sure the firmware is up-to-date it’s time to install custom fonts on your Kindle. First of all, note that only OpenType (OTF) or a TrueType (TTF) fonts are supported. Second of all, you’ll need to find some fonts you like to install on your reader. You can either pick a font from your computer’s Fonts folder or download them from a third-party website. There are several places you can download free fonts online. Here is a list of some you might want to check out:
Font Squirrel1001 Free Fontsdafont.comFont SpaceFontstock.net
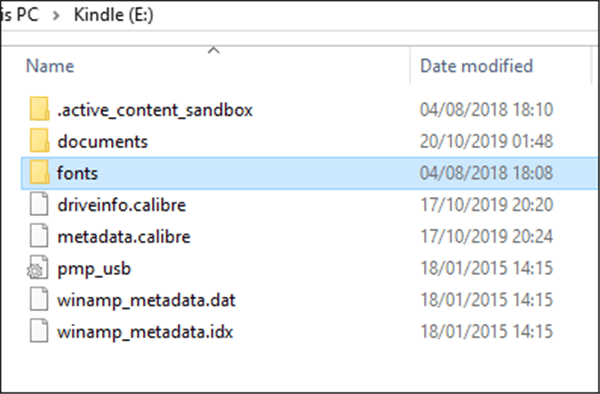
Save the font file you want on your computer. Then connect your Kindle to your computer via USB cable. Then you will be able to browse your Kindle’s internal memory just like any connected external drive. Find the Fonts folder and copy and paste the font file you downloaded in there. Then disconnect your Kindle from the computer.
Check the New Font on Your Kindle
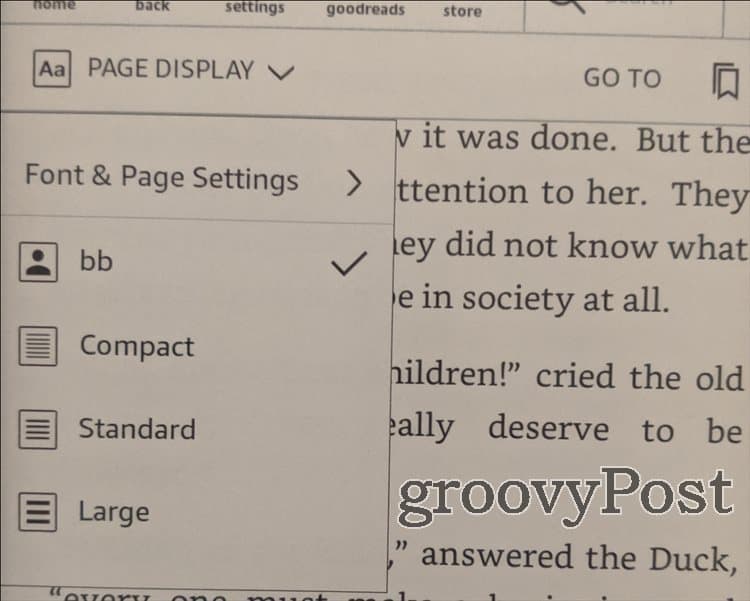
Now it’s time to see if the font you chose works out for you on your Kindle. Open a book and tap Page Display > Font & Page Settings.
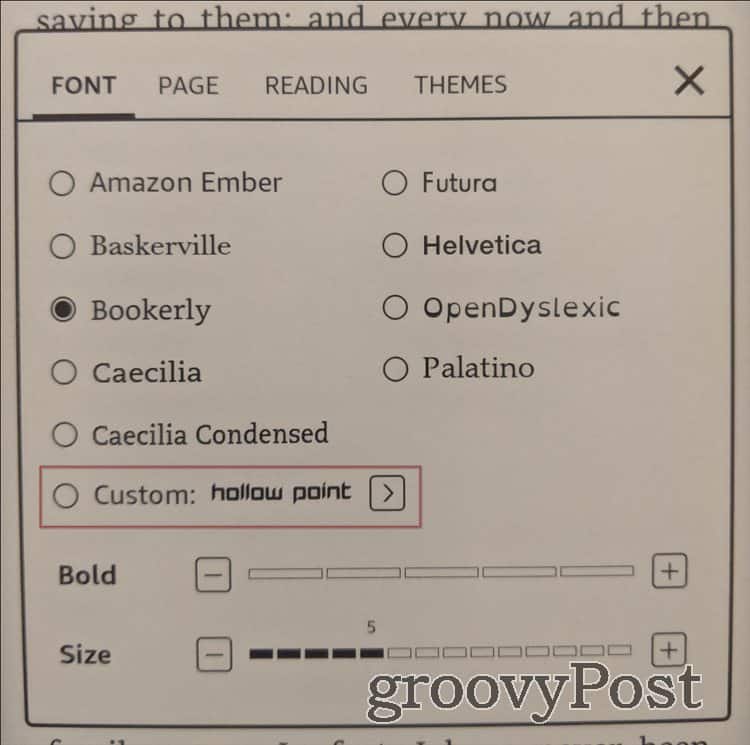
Your new font should be available now next to the Custom tag.
Also, note that in this section you can change your font back and adjust other font settings like size and boldness.


![]()
