If you don’t have a powerful enough system to run a virtual machine (VM), dual booting is a good choice. Also, while running Windows 8 on a VM works, nothing beats running it on physical hardware.
Add a Windows 8 Partition
Important Note: Windows 7 is no longer supported by Microsoft. Windows 8.1 was also reached the end of mainstream support. Make sure you have upgraded your machine to Windows 10 for the latest secure version of Windows. Since you already have Windows 7 running on your system, you need to create a partition for Windows 8. Click Start, right-click Computer, and select Properties.
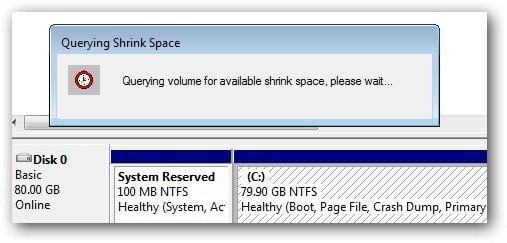
The Computer Management screen opens. Under Storage, click Disk Management. This will show your local (C:) drive. Right-click on the (C:) drive box and click Shrink Volume. Wait while the system queries the disk for space that’s available to shrink.
Next, you’ll get a set of results of the query listed in megabytes. Here, you can see the drive’s total size, amount of shrink space, and total size after shrinking the volume. Here I’m going to shrink the drive by 20GB to install Windows 8 on. The minimum size for Windows 8 Consumer Preview is 16GB for the 32-bit version and 20GB for the 64-bit version. After entering the value, click Shrink.
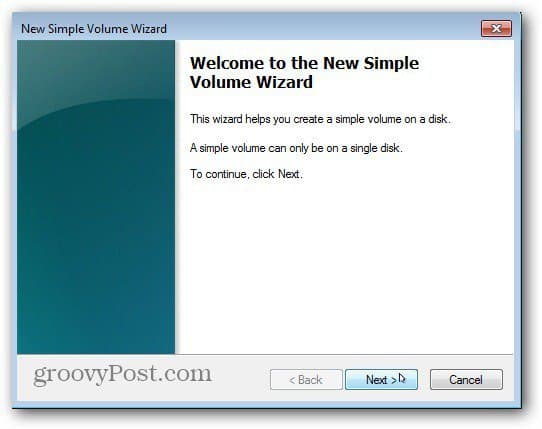
After a couple of minutes, you’ll see the new partition of Unallocated space—Right-click on it and select New Simple Volume.
Next, work your way through the New Simple Volume Wizard.
Verify the size of the volume and click Next.
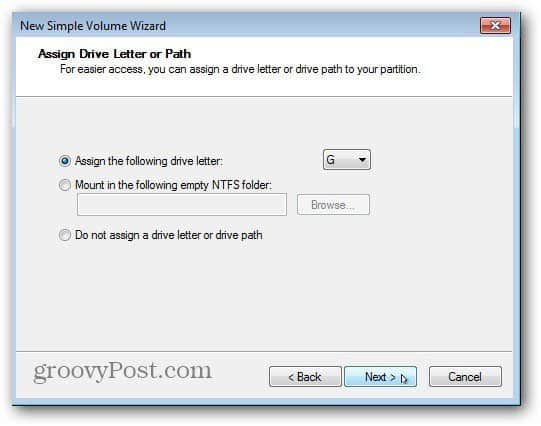
Now assign a drive letter for the Windows 8 partition.
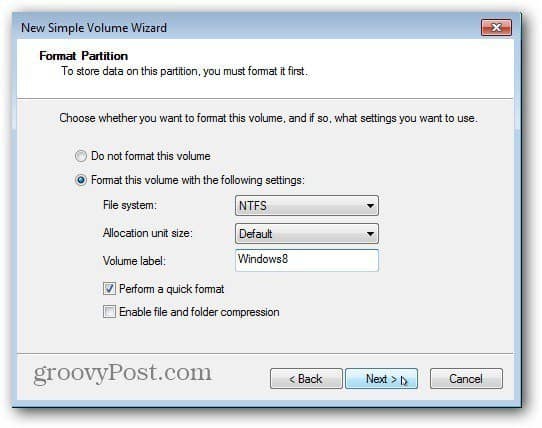
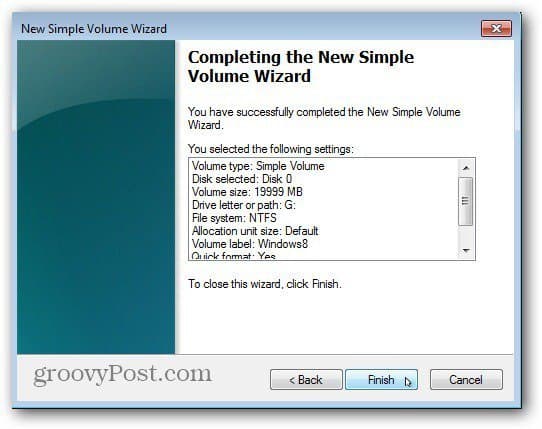
The next step allows you to format the volume. You can keep the defaults. You might want to give the partition a name in the Volume Label field.
Click Finish to complete the New Simple Volume Wizard.
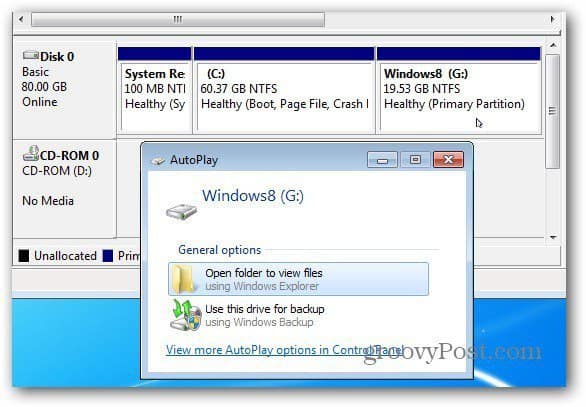
The system will format the partition, create the drive letter and volume name you selected. If you have AutoPlay enabled, it will pop up. Of course, nothing is in it since it’s a clean partition. Now close out of Disk Management.
Install Windows 8 Consumer Preview
Now you’re ready to install Windows 8. Download the ISO from Microsoft’s site if you haven’t already. Then, burn the Windows 8 ISO to DVD or create a bootable USB drive.
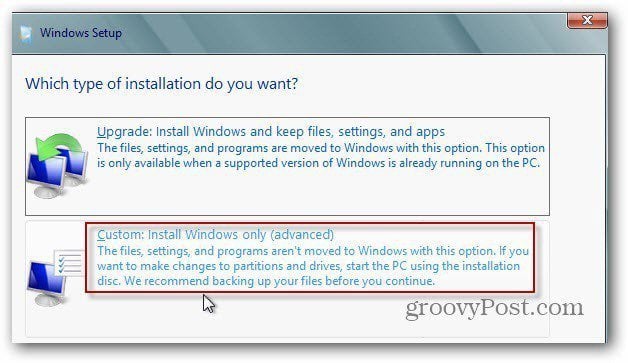
Boot your system from the Windows 8 DVD or USB flash drive to begin the install. When the Install Type screen appears, select Custom. This is different than doing a Windows 8 clean install on a fresh drive or an upgrade install over the Web.
Navigate through the install wizard and when you get to the Install Type screen, select Custom. This is a clean install on a new partition, not an upgrade.
Next, select the drive you just made a partition for Windows 8 in the steps above. In my case, I created a 20GB partition named Windows8 to find it easily.
Windows 8 starts the installation like normal.
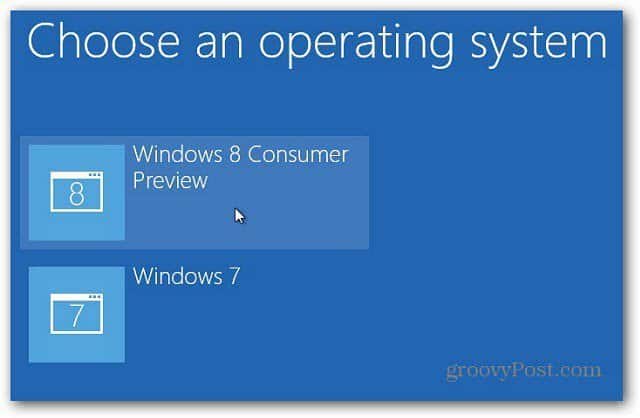
After each restart, at the boot screen, you’ll get a choice between Windows 8 and Windows 7. If you miss it and don’t select anything, it will boot into Windows 8 after 30 seconds by default.
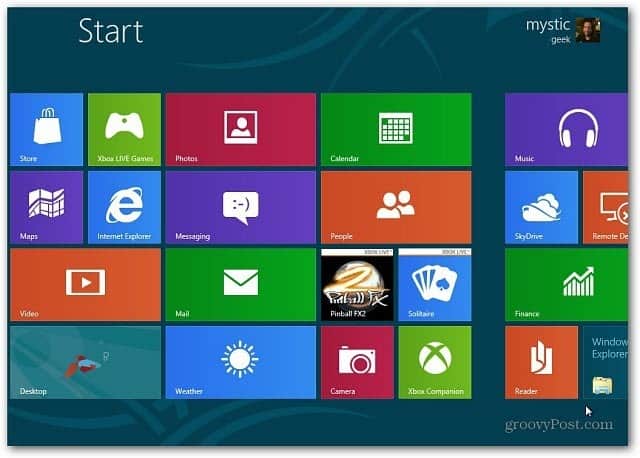
Then finish setting up the rest of the Windows 8 settings and log in.
There you go! You now have your dual boot system running Windows 7 and Windows 8.
Any time you restart, you’ll get the boot loader that asks if you want to start in Windows 7 or Windows 8 Consumer Preview. It all went as advertised through booting from the DVD, selecting the language, time and keyboard type, then choosing “Install Now”. The next screen is asking me to “Enter the Product Key to Activate Windows” andf that’s where I’m stuck. I am runing Windows 7, 64 bit on a fairly nerw machine. I allocated 24 GB for Windows 8. I’ll go back to the Microsoft page and see what other tips I may find there. I’d appreciate any ideas you may have. 6RH4V-HNTWC-JQKG8-RFR3R-36498 The installation is proceeding. After about 10 minutes, it’s on the second step (Expanding Windows Files) of the 5-step list. Vasni 16GB for 32-bit Windows 8 Consumer Preview 20GB for 64-bit Windows 8 Consumer Preview Remember those are the minimums recommended by Microsoft. So, if you plan on downloading and storing a lot of data on your Windows 8 partition, size accordingly. Comment Name * Email *
Δ Save my name and email and send me emails as new comments are made to this post.


![]()
