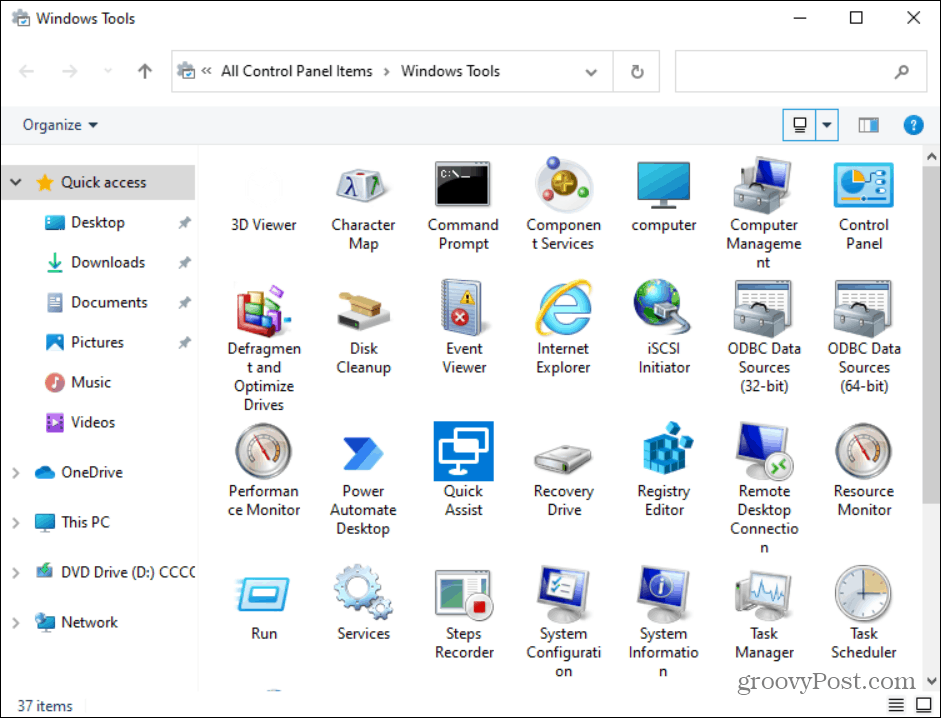
Windows Tools Folder
Create a Shortcut to the Windows Tools Folder on Windows 10
To get started hit the Windows key and click on the Windows Tools icon on the left-hand side. You can find it quicker by opening W directly. Then drag and drop it over to the desktop.
That creates the shortcut on the desktop. And you need to double-click on it to open the Windows Tools folder.
Create a Shortcut to Windows Tools Manually
While dragging and dropping it on the desktop is the easiest way to create a shortcut, you can do it manually, too. Start by right-clicking an empty spot on the desktop and go to New > Shortcut.
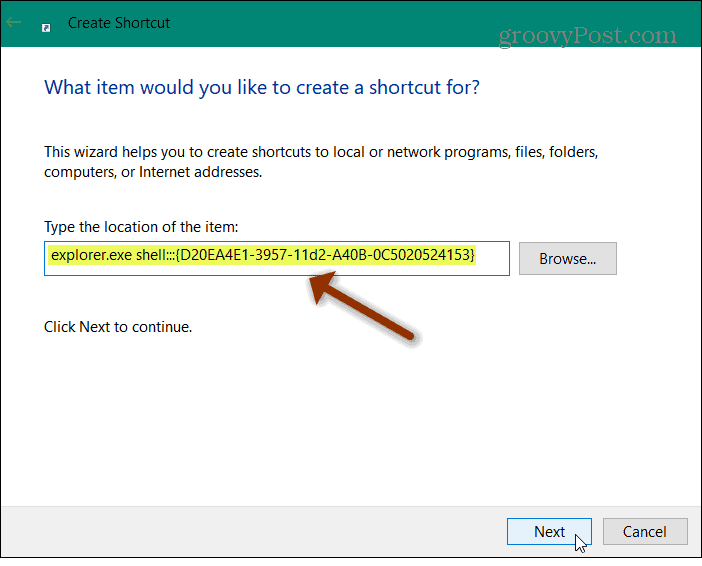
That opens the “Create Shortcut” wizard. Copy and paste the following into the “location of item” field: Click the Next button on the Shortcut Wizard after entering the path above.
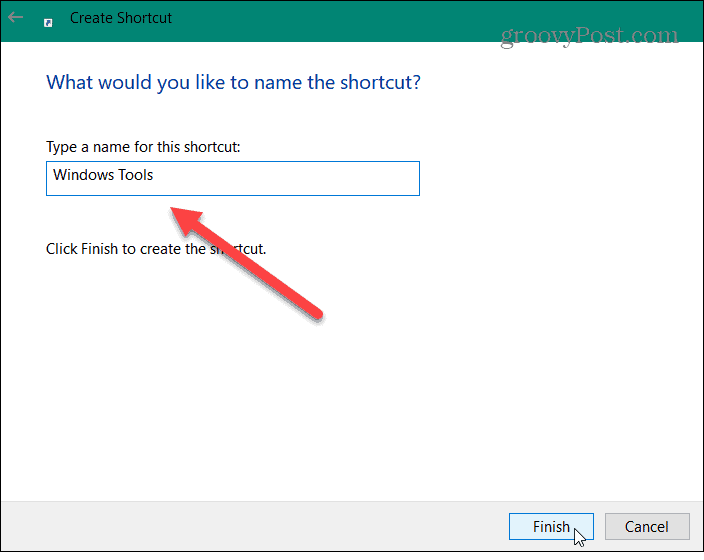
Next, type in a name for the shortcut that you would like to use. Something like “Windows Tools” would be an obvious choice as it allows you to remember what the shortcut is for. But you can name it whatever you want. When you are done, click the Finish button.
Now, if you want to change the shortcut icon, you can. First, right-click it and select Properties from the menu. Then make sure the Shortcut tab is open and click on the Change Icon button.
Then choose from the default shortcut icons or add a custom icon. Note: System icons are located in: c:\windows\system32\imageres.dll
That’s all there is to it. Now you have a shortcut to the Windows Tools folder. It’s also worth noting that you can add it to the Taskbar or the Start Menu as a tile on the right-hand side. To add it, right-click the shortcut you created and select either Pin to Taskbar or Pin to Start.
And for more on Windows 10 shortcuts, check out our article on creating a desktop shortcut to the Favorites folder. Or take a look at our article on how to create a shortcut to Device Manager. Comment Name * Email *
Δ Save my name and email and send me emails as new comments are made to this post.
![]()


![]()
![]()

